
Adding Clients
Last updated 9 April 2025
Adding Clients
Adding clients is the first real step in starting the coaching journey on Bolder.fit. The process is designed to be simple, clear, and secure, ensuring your client gets access to their account immediately.
Where do you add clients?
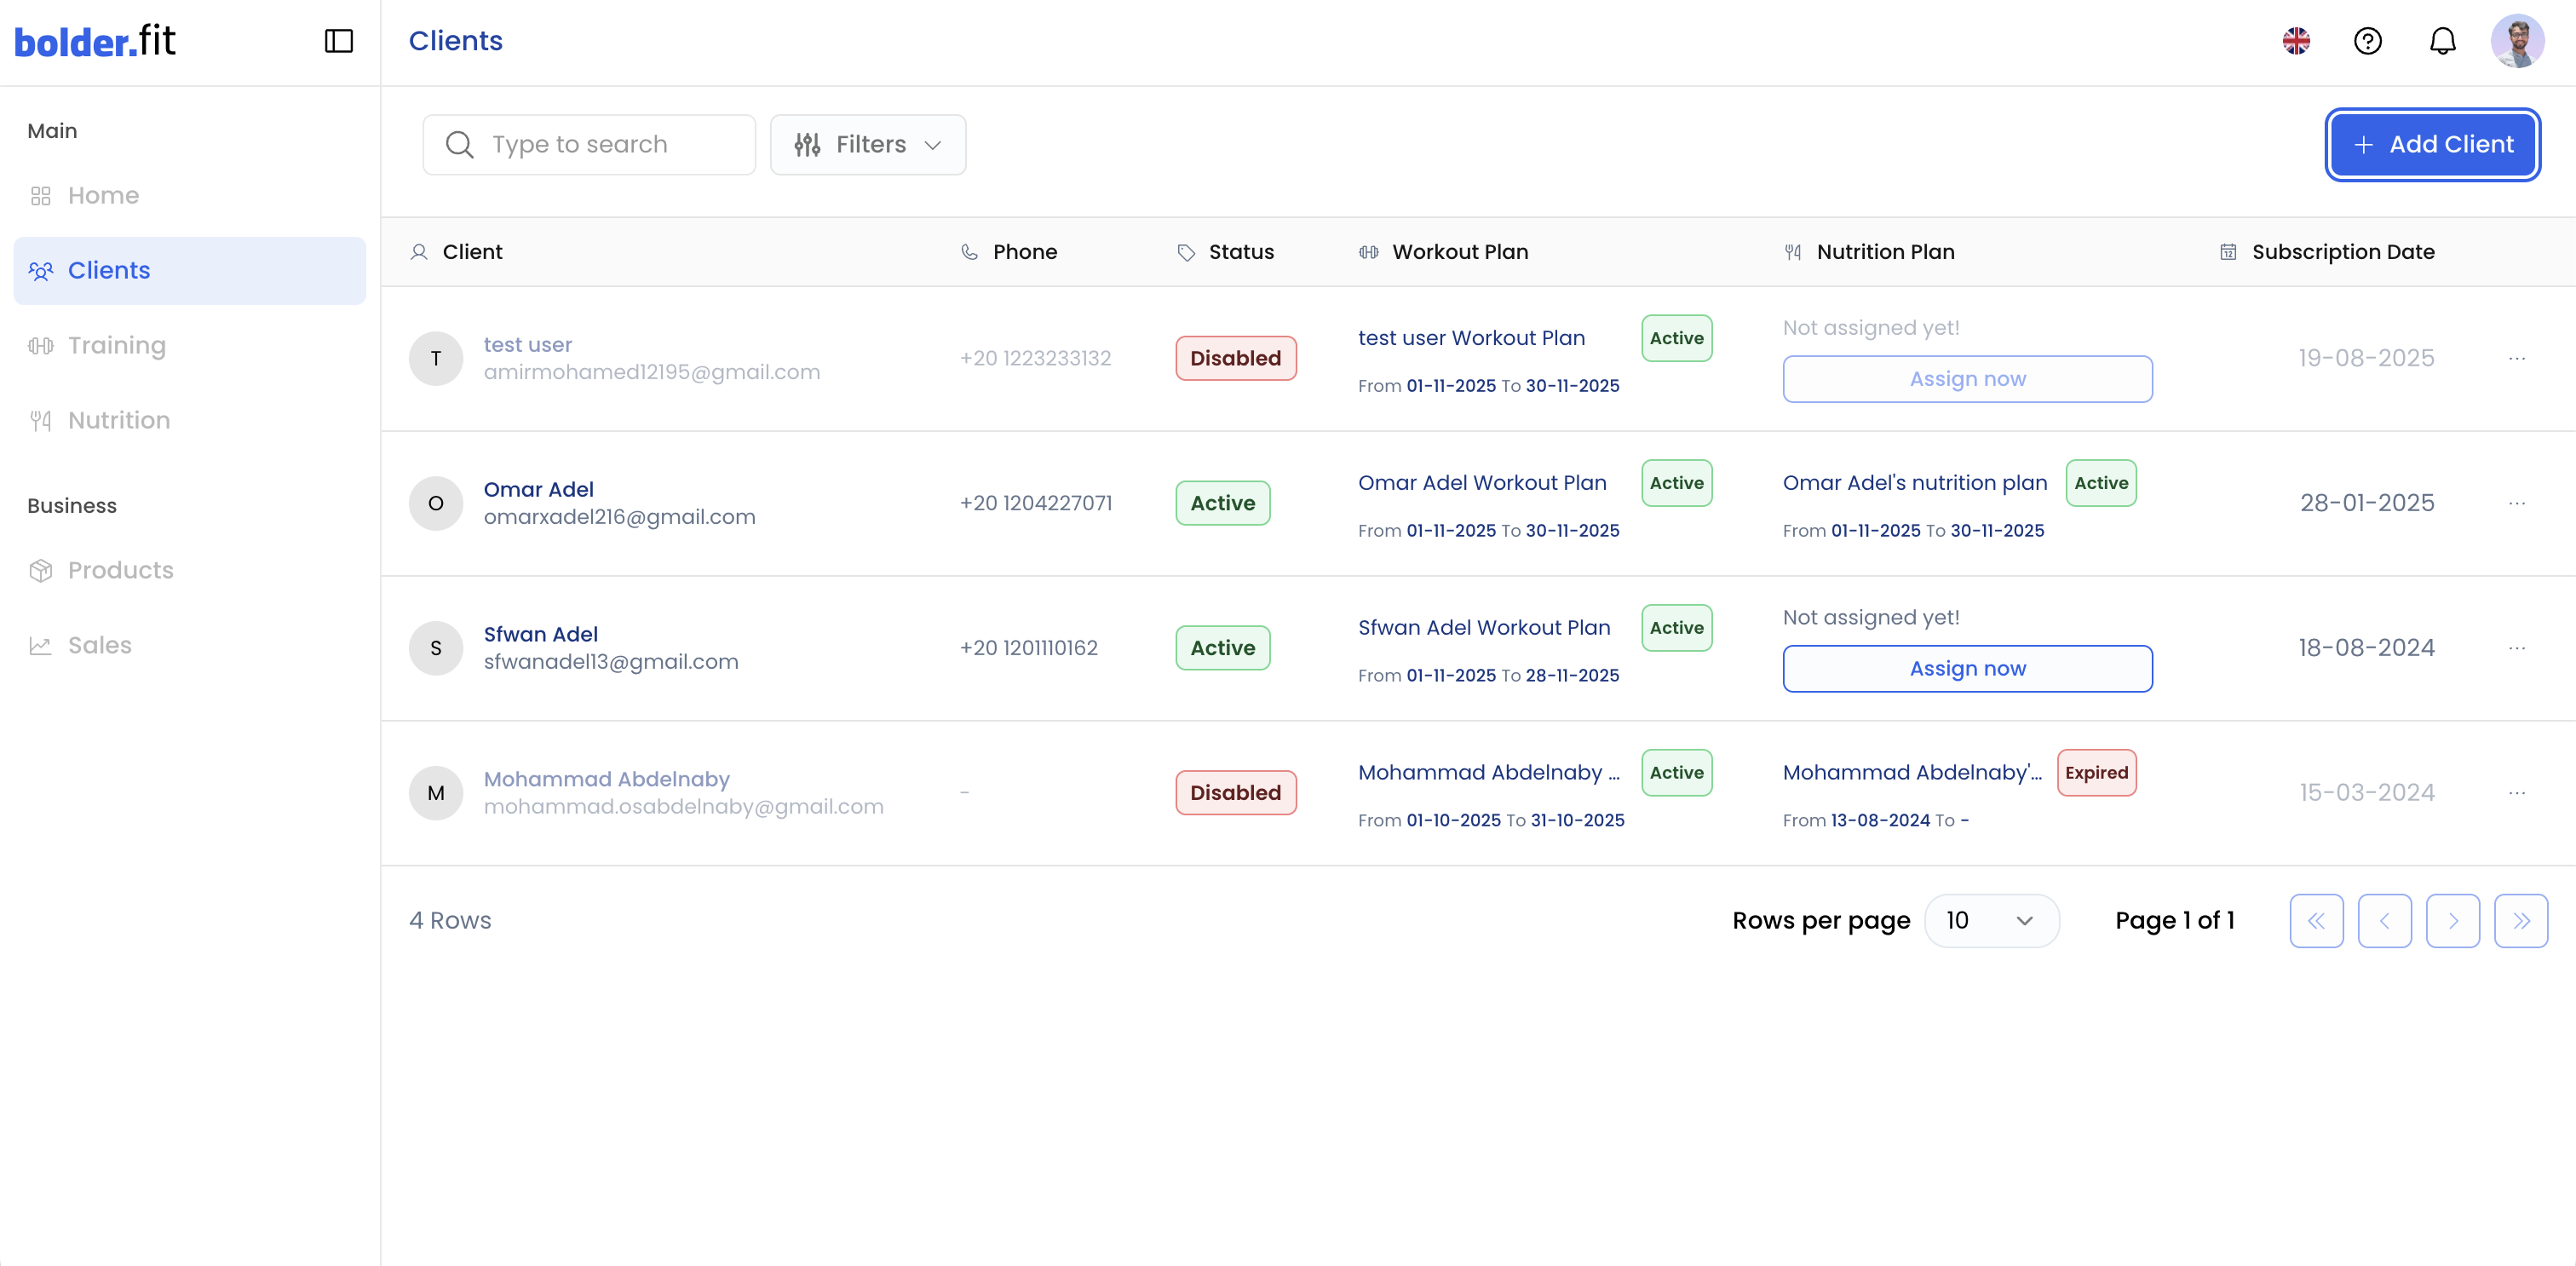
Clients are added from the Clients page.
Steps:
- Go to the Clients page from the side menu.
- Click Add Client.
- The Add New Client dialog will appear.
Required client information
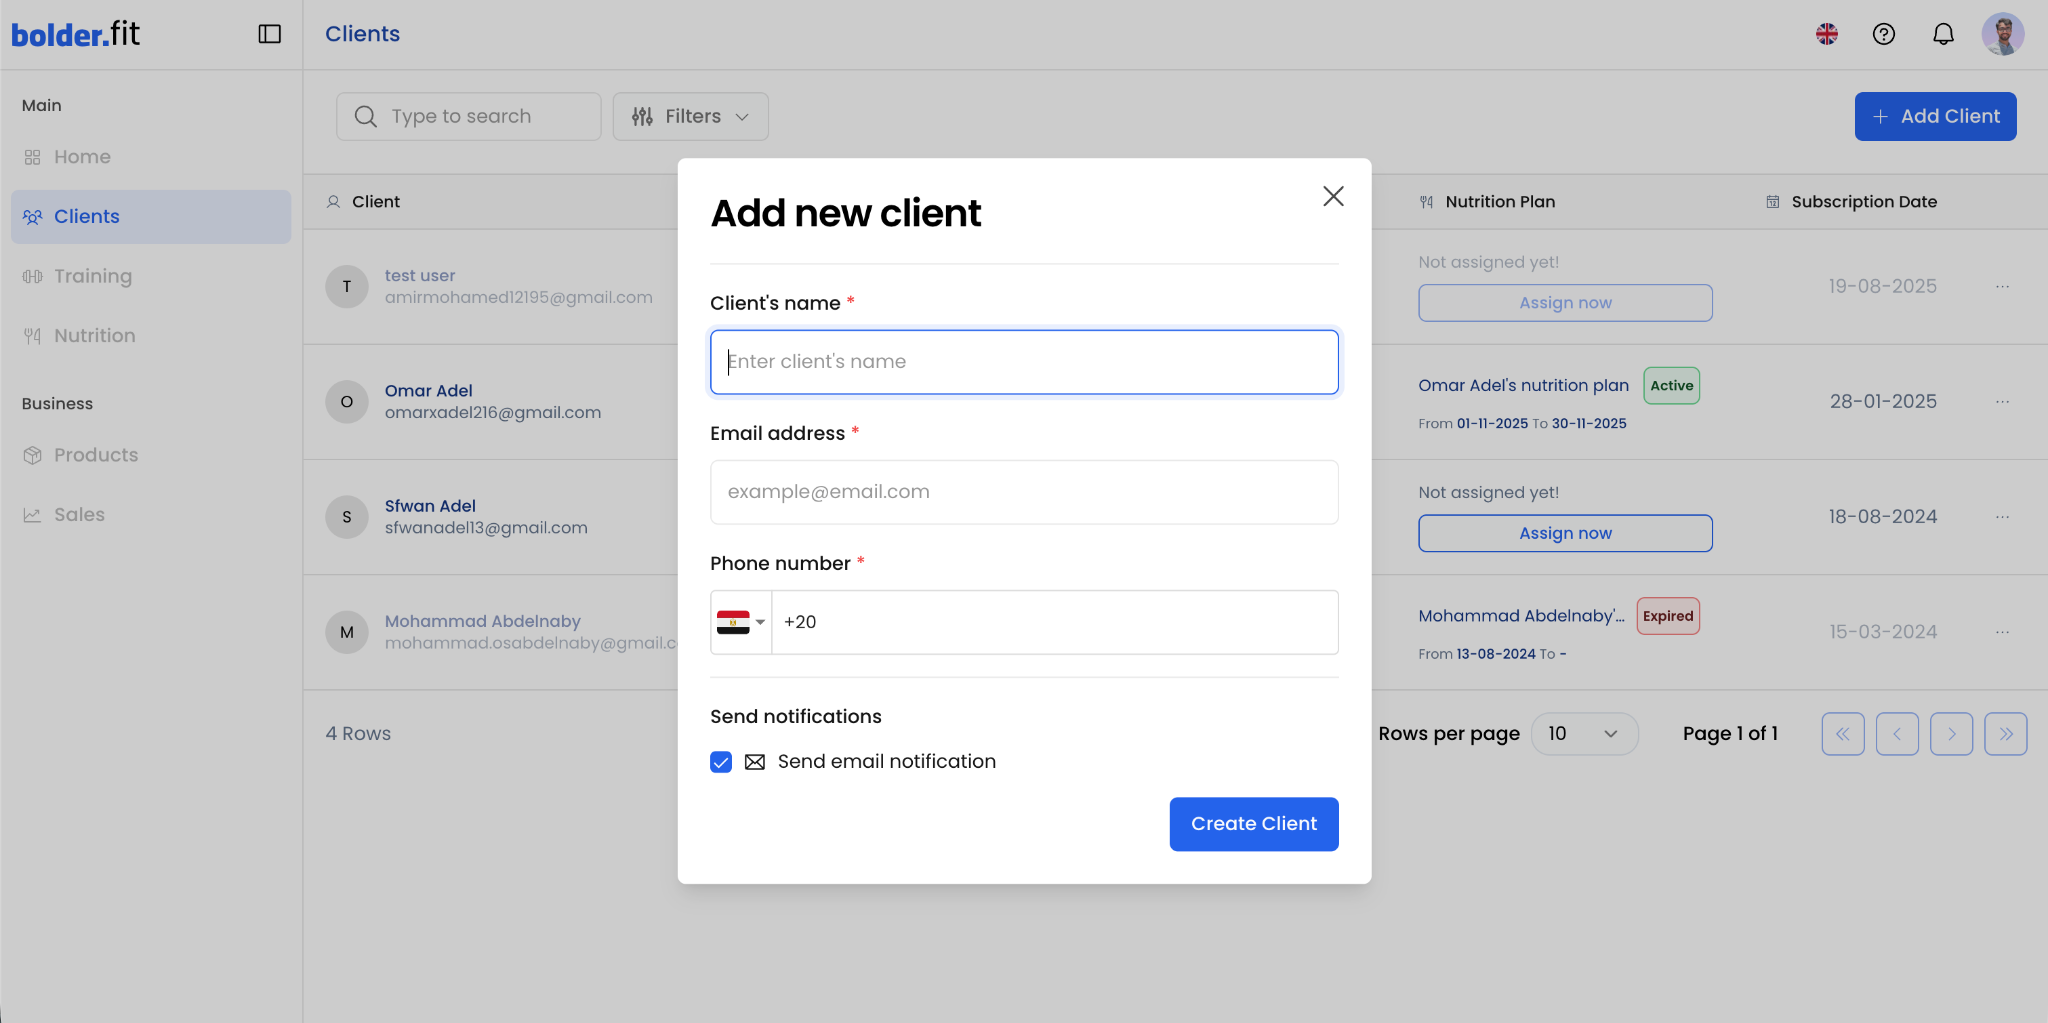
When adding a new client, you need to provide the following:
- Client’s name (required)
- Email address (required)
- Phone number with country code (required)
Optional:
- Enable or disable Send email notification.
⚠️ Make sure all details are correct. They are used to create the client’s account and send login credentials.
What happens after creating the client?
After clicking Create Client:
- A client account is automatically created on Bolder.fit and is added to your clients table.
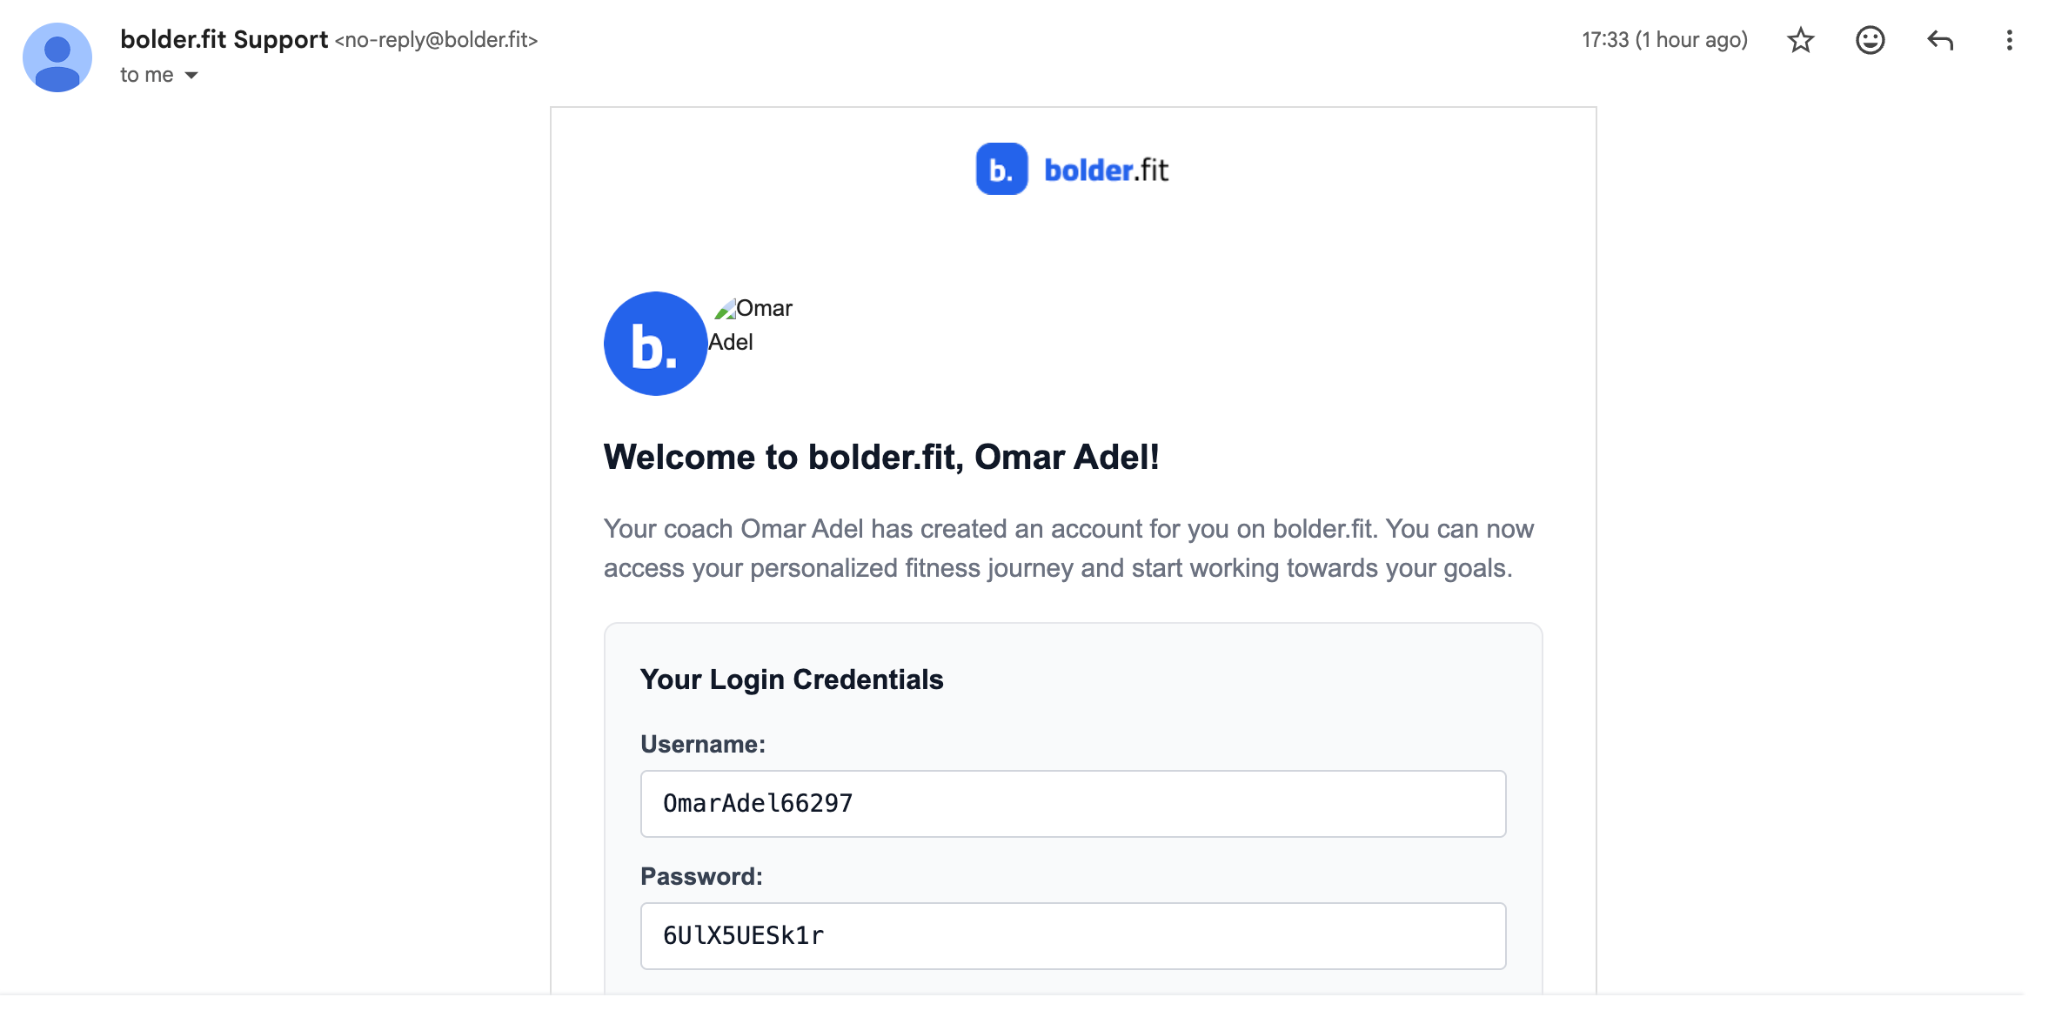
- The client receives an email that includes:
- A welcome message
- Username
- Password
- Login instructions
This email acts as the official invitation to join the platform and start their coaching journey.
Your role as a coach after adding a client
Once the client is added, it’s recommended that you:
- Confirm the client was able to log in successfully
- Assign a training plan and/or nutrition plan as soon as possible
- Use the first interaction to explain how the app works
A strong start increases client commitment and trust.
Important notes
- Avoid sharing login credentials manually unless absolutely necessary
- If the client doesn’t receive the email, ask them to check their Spam folder
- You can edit or manage client details anytime from the Clients page